Setting security policies with Windows 11 Pro
Setting Security Policies with Windows 11 Pro
Windows
11 Pro offers enhanced security features, making it a preferred choice for
businesses and advanced users. One of the key advantages of Windows 11 Pro is
the ability to configure security policies to protect devices, data, and
network resources. This guide will walk you through the steps to set security
policies effectively in Windows 11 Pro.
1. Accessing Local Group Policy Editor
The Local
Group Policy Editor allows you to manage security policies in Windows 11 Pro.
Steps to Access Local Group Policy Editor:
- Open Run Dialog:
- Press Windows Key + R
to open the Run dialog.
- Launch Group Policy Editor:
- Type gpedit.msc and hit Enter. This
will open the Local Group Policy Editor.
2. Navigating to Security Policies
Within
the Local Group Policy Editor, you can navigate to specific security policies.
Steps to Navigate to Security Policies:
- Expand the Local Computer
Policy:
- In the left pane, expand Computer
Configuration.
- Go to Windows Settings:
- Navigate to Windows
Settings > Security Settings.
- Access Local Policies:
- Expand Local Policies
to find various options like Audit Policy, User Rights
Assignment, and Security Options.
3. Configuring Audit Policies
Audit
Policies help track and log security-related events on the system.
Steps to Configure Audit Policies:
- Select Audit Policy:
- Click on Audit Policy
under Local Policies.
- Define Audit Settings:
- Double-click on a policy
(e.g., Audit logon events) to configure it.
- Choose to Success, Failure,
or both, then click OK.
- Enable or Disable Specific
Audits:
- You can enable audits for
various events such as logon attempts, file access, etc.
4. User Rights Assignment
User
Rights Assignment allows you to define what users can or cannot do on the
system.
Steps to Configure User Rights:
- Select User Rights
Assignment:
- Click on User Rights
Assignment under Local Policies.
- Modify User Rights:
- Double-click on a policy
(e.g., Deny log on locally) to add or remove user accounts or
groups.
- Click on Add User or
Group to include specific users or groups.
5. Setting Security Options
Security
Options provide various settings to enhance security.
Steps to Configure Security Options:
- Select Security Options:
- Click on Security
Options under Local Policies.
- Modify Security Settings:
- Double-click on a policy
(e.g., Accounts: Administrator account status) to change its
settings.
- Select Enabled or Disabled,
then click OK.
- Important Security Settings:
- Configure settings like
account lockout policies, password policies, and User Account Control
(UAC) settings.
6. Windows Defender Policies
Windows
11 Pro integrates Windows Defender, which can be configured through the Group
Policy Editor for enhanced security.
Steps to Configure Windows Defender Policies:
- Navigate to Windows
Defender:
- Go to Computer
Configuration > Administrative Templates > Windows Components >
Microsoft Defender Antivirus.
- Enable or Disable Defender
Features:
- Double-click on any policy
(e.g., Turn off Microsoft Defender Antivirus) to enable or disable
it.
- Adjust Scanning Options:
- Configure settings for
real-time protection, cloud-delivered protection, and scanning schedules.
7. Managing Device Security Policies
Windows
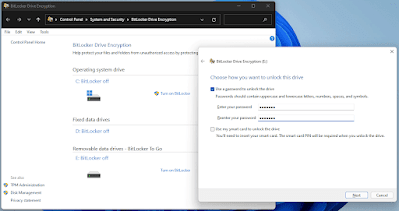
11 Pro provides options to manage device security policies for BitLocker and
Windows Hello.
Steps to Configure Device Security:
- Access Device Security
Settings:
- Go to Computer
Configuration > Administrative Templates > Windows Components >
Device Security.
- Configure BitLocker
Policies:
- Enable policies for
BitLocker Drive Encryption, including settings for encryption methods and
recovery options.
- Manage Windows Hello
Settings:
- Configure policies related
to biometric authentication and PIN requirements.
8. Implementing Security Baselines
Microsoft
provides security baselines that are pre-configured security settings that help
protect devices.
Steps to Implement Security Baselines:
- Download Security Baselines:
- Visit the Microsoft
Security Compliance Toolkit and download the security baselines for
Windows 11.
- Import Baseline Settings:
- Open the Group Policy
Editor and navigate to Computer Configuration.
- Import the settings from
the downloaded baseline and apply them to enhance security.
Conclusion
Setting
security policies in Windows 11 Pro is crucial for maintaining a secure
computing environment. By utilizing the Local Group Policy Editor, you can
configure audit policies, user rights assignments, security options, and
Windows Defender settings effectively. Additionally, implementing security
baselines can further strengthen your system’s security posture. These measures
help safeguard sensitive data and ensure that only authorized users have access
to critical resources, enhancing overall security in Windows 11 Pro.
Microsoft Windows 11 Pro - The upgrade your PC needs
Are you ready to improve your computer's performance? Microsoft Windows 11 Pro is the perfect solution for those looking for productivity, security, and a smoother user experience. With new tools to organize your windows, better app integration, and a more modern design, Windows 11 Pro takes your PC to the next level.
Plus, with advanced features like BitLocker to protect your files and support for virtual environments, it's the ideal choice for professionals and businesses. Don't wait any longer and get Windows 11 Pro on Amazon today!


%20FPP%2064-BIT%20ENG%20INTL%20USB%20Flash%20Drive.jpg)
